Eight weeks to organized... Bathroom {part 1}
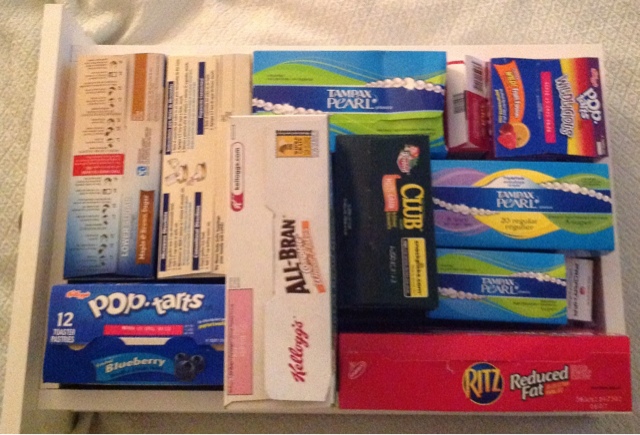
Since I have been sick with a sinus infection and ear infections, organizing my bathroom drawers seemed like a good task--I could sit in bed and bring the drawers to me. I had a long ways to go as the "before" picture below show....
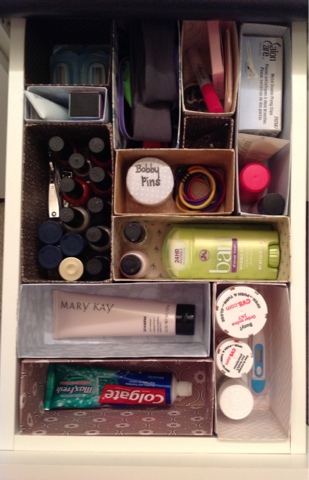
I decided to take this project one drawer at a time and start with DIY cereal box drawer dividers inspired from a post on iHeart Organizing {one of my favorite blogs} that I had been dying to try. You can find her original post here. I should tell you now that this took me longer than I expected, but I did not have to spend any money which is always a huge positive. I started out by gathering boxes that I had been collecting for this particular project.
Then, I began fitting the boxes together in the drawer that I wanted to organize. Keep in mind that my boxes did not magically fit in the drawer like this the first time. I actually tried several different options {while watching tv} until I decided to stick with one. The cereal box was not in my original pile of boxes to choose from. I swiped that from the pantry when I realized I needed a few more options. So just keep trying until they fit together--think of this part as a puzzle.
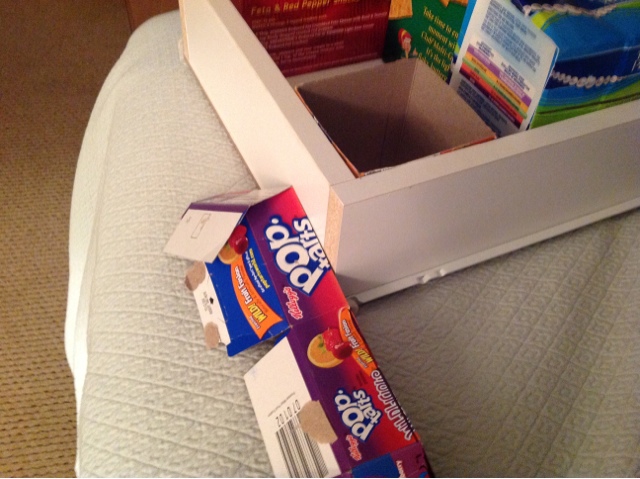
Next, I traced around the outside edge with a marker. There are several ways you could accomplish this step. Measuring would work just as well, but at the time this seemed easier to me.
Then, I cut the boxes to be flush {or as close as possible} with the top of the drawer. This step takes some time.
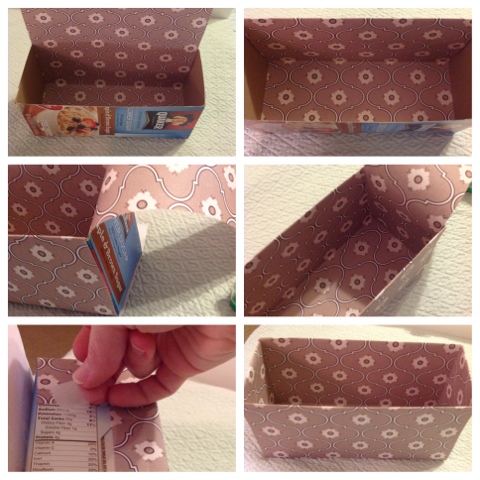
Next, I used scrapbook paper that I had from a previous project to cover the boxes. I measured the paper and made the creases before using glue and tape to secure the paper in place. At the beginning, I was completely covering the boxes inside and out. Then, I decided that it was most important to line the insides and not worry as much about the outside since that would not be showing. Any pretty paper would work for this step. Maybe you have wrapping paper or large decorative sheets of paper that are sold at craft and art stores. It probably would have been easier if I had used wider paper for this step, but I was trying to use items I had on hand in order to keep the cost down.
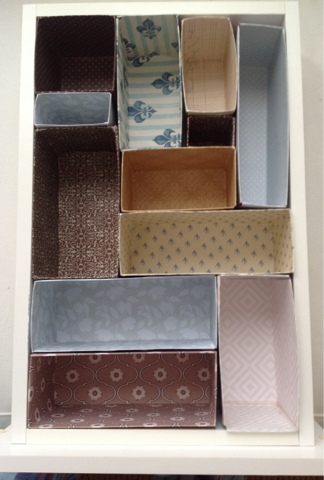
After lots of measuring, cutting, gluing, and taping, I finally finished covering all of my boxes and here is how my organizers turned out.
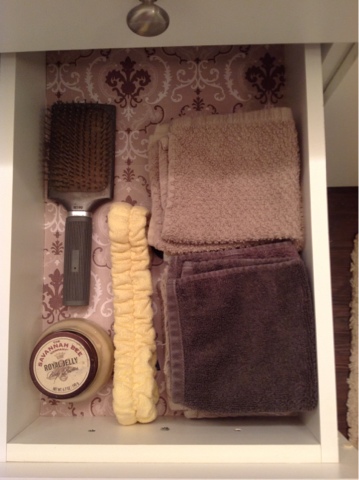
Next, I wanted to make the other drawers as pretty but did not need all of the different sections. Rather than buying contact paper to line the drawers, I used scrapbook paper from the same book that I used to line the boxes. I matched up the pieces and taped it down to prevent it from sliding around.
Because I had created so much organized space in my top drawer, it opened up the space in the drawers below. Now the drawers look like this... Some of the items in the very back are not easily accessible, but those are items that I do not use regularly.
When I was cleaning out my drawers, I realized there were lots of product samples without a "home". For now, I threw them all into one of my spare baskets that came from the dollar store years ago. I am planning on putting the basket in our second bathroom for guests. I will probably add to this over time in order to make it a more complete selection. Currently, there are different types of shampoo, conditioner, lotion, sunscreen, mouth wash, and tooth paste. As well as being great for guests, these are all great sized products for travel, and any time I need something for a trip, I will know exactly where to find it.
Low budget organization may take more time {and patience while accomplishing it} but it was great to finish part 1 of my project still not having spent $1. Do you repurpose items in order to help with organization? I would love to hear about some of your ideas and projects.
Happy spring cleaning!
Nicole
Closet: Storing off season items {part 2}
So, here are my before and after's of my closet. There is not a lot of drastic change, but I did accomplish everything I set out to do. I started by taking most everything out of the closet and separating the items into those that I wanted to resell/donate, those that needed to be stored for winter, and those that should stay for the summer. I wanted all of my shoes to have their own "place", so I stored the off season shoes in a container under a bench. I happen to wear a lot of shoes that could be considered winter for work, so anything I was doubtful about, I kept in the closet.
{Before} {After}
Notice the shelf to the right{above} and the floor {below} are now clear. Remember, one of our goals is to keep horizontal services clear!
{Before} {After}
Prior to this cleanup and cleanout, the top of my closet was merely a place that I put {threw} things when there was no where else to put them. Another problem I had, was the large amount of tshirts that were taking up a lot of drawer space. The basket is something I have had for a while that was not really being used for anything. It now houses by bathing suits and coverups!
{Before} {After}
The last area was this smaller {detached} closet that was previously a place for cocktail/nicer dresses that I didn't want to get tangled up in my other clothes and place to quickly hang dry cleaning {instead of putting it away like I should}. Now it is the perfect place for t shirts....I moved the hanging shelf from the other closet because it didn't really fit there anyway. Jackets hang on the left and cocktail/nicer dresses on the right!
Lastly, I found a perfect tote to lay my dry cleaning in for the bottom of this closet, and it has handles so I can just scoop it up and take it to the car when I need to go to the cleaners.
{Before} {After}
And....I found this old shower curtain rod and some hooks that served as a great way to store my purses so that I can see them and they keep their proper shape.
Like I said before, I didn't have too terrible of a mess when I started, but I can say that it is much easier to get dressed now with everything tidy and visible!
One tip that I learned through the process is to use what you have to divide areas. Notice I used a beach bag next to my bathing suits {handy}. Or, use pretty shoe boxes to serve as the perfect bin to hold smaller items that get messy easily {see the DVF magenta one-my tights are in there!}
I hope I have inspired you to tidy up!! Good Luck....
Enjoy,
Sarah
Skinny~Spaghetti Squash Alfredo!!
I tried spaghetti squash for the first time a few of years ago, and I like to use it as a side when I am trying to cut back on carbs! I have always just cooked the squash {in the oven} and added a little butter, salt, and pepper. So, when I came across a this recipe from The Comfort of Cooking, I couldn't wait to try it!
Try it out and let me know what your think!! I don't think you will be disappointed :)
Enjoy,
Sarah
Closet: Storing off season items {part 1}
Ok, so, I have to admit that I clean out my entire closet every spring and every fall...so, the before {seen here} is not too bad. If your needs a little more help than mine, just stick with it, and, come fall, it will be much easier to tidy up!
Before I actually got started on the closet, I decided to make a tentative plan and purchase some storage containers. I have been storing my off season clothes in flat bins under my guest bedroom bed for many years {this started because I lived in apartments and it was the only option}, but ideally I would like to get rid of these bins.
After researching several sites, I found The Container Store had a spring cleaning sale going on and decided to buy these grey storage bags to store my off season clothes in the top of my closet. I took measurements and decided on 3 of the extra-large bags.
**Make sure to measure the area where the bags will go and try to fill that area!**
The Container Store
$7.99-9.99
I love that these bags have labels and are open on 3 sides so you can easily add to or remove things you may need throughout the year.
In addition to my main closet, in my bathroom, I have a smaller closet in my bedroom, that I have not been utilizing completely. I decided to transfer some items that were jammed into the larger closet, to the smaller closet. One of which was a hanging shelf organizer that I purchased from Wal-mart last year. It really saves a lot of money if you try to utilize the items you have as much as possible. Click here to find one that is similar to mine.
Get Organized
$12.98
{Check for coupon codes online-I found %15 off with: GETORGNZ)
Last year, as a wedding gift, Carey had a closet built for me! When we did this, we had the builder add molding on one wall to hold shoes. This was an idea that I found on Pinterest, and it is a relatively easy DIY project. It is very important to have a place to store shoes in a visible place because everything stays a lot more tidy if we keep items off of horizontal services {the floor}.
My inspiration:
Mine{before tidying}:
I would love add more molding and "store" off season shoes up high in the future {the ceiling in my closet is 10 feet high!}, but, for now, I am going to pack the off season shoes away.
***TIPS to get STARTED***
1. Measure your areas
2. Take note of items that are often out of place or do not have a place
3. Make a plan that works for your budget and items
4. Keep horizontal service clear {floor of the closet, tabletops}
5. Store seasonal items out of sight, in areas that cannot be accessed as easily {reserve highly accessible areas for items that are needed more often}
Stay tuned for PART 2, the finished product! Happy organizing :)
Enjoy,
Sarah
Eight Weeks to Organized: The List
{THE LIST}
Sarah:
1. Closet(s)a. Clean out/store off season clothes
b. Find a new place for make-up, scarves, and "folded clothes" {notice the hanging shelf jammed behind/between two hanging bars in my closet}
c. Organize/utilize small closet in bedroom
d. Use available storage wisely {under bench in bathroom, top of closet}
Closet(s) before
2. Laundry room
a. Remove everything from washer/dryer closet; paint, and reorganize with cabinets, bins, or shelves
b. Stack washer/dryer
c. Organize broom closet
d. Designate area for ironing and dry cleaning
Laundry room before
Nicole:
1. Closet(s)
a. Clean out/store off season clothes in Master Bedroom closet
b. Organize desk/vanity in Master Bedroom closet
c. Organize behind door of Guest Bedroom closet to make it usable storage
2. Bathrooma. Clean out/store off season clothes in Master Bedroom closet
b. Organize desk/vanity in Master Bedroom closet
c. Organize behind door of Guest Bedroom closet to make it usable storage
Master Bedroom Closet before
Desk/Vanity before
Guest Bedroom (behind door) before
a. Organize master bath drawers with containers to provide more storage and define a place for things
b. Throw away expired medications and organize under bathroom sink
If you have some similar situations going on in your house or apartment, follow along with us as we organize, refresh, and streamline all of our STUFF.
Good luck and Enjoy,
Sarah & Nicole
Subscribe to:
Posts (Atom)


